How to create good kmz (google earth) files
On this page: [Create a polygon in Google Earth] [Saving your .kmz file] [Editing a .kmz polygon in Google Earth]
| Print this page |
Create a polygon in Google Earth
1. Open Google Earth.
2. Navigate to your forest area.
3. Zoom in so that your stand of trees occupies most of the screen.
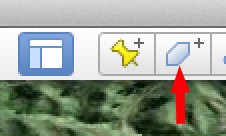
4. Click on the ‘Add polygon’ button up on the tool bar at the top.
5. A dialogue box will open. Over-type ‘Untitled Polygon’ with your name.
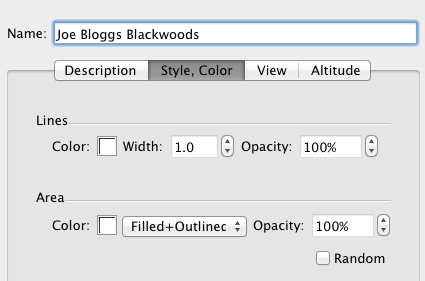
6. Click on "Style, Colour", then under Area select "Outlined" (If you select "Filled+Outlined" your polygon will be all white).
7. Then move the cursor to the edge of the stand and click a spot. Keep clicking around the perimeter of the stand until the polygon is closed.
8. If you make a mistake while drawing the stand perimeter, just click ‘Cancel’ at the bottom of the dialogue box and start again.
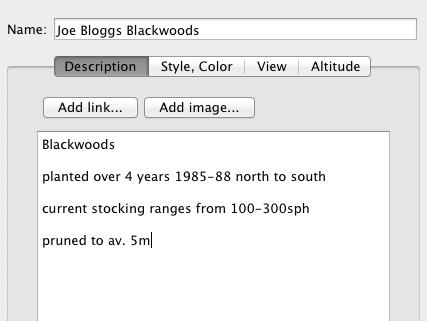
9. Then click on "Description" somewhere in the blank space in the dialogue box and type the following info:
year planted, current stocking or stem spacing (eg. 3 x 3 m), pruned Y or N, estimated average pruned height
10. Then click ‘OK’ at the bottom of the dialogue box.
Saving your .kmz file
11. In the left-hand margin of the Google Earth window, look for the name of the polygon you’ve just made.
12. Right-click on this and click on ‘Save place as...’
13. Type your name and type a 1 straight after it (eg. KenJones1), note the folder that you’re about to save it to (the default is usually ‘My Documents’) and then click ‘Save’. (eg. The saved file should be like KenJones1.kmz)
If you have stands of different ages (or different pruning), make a separate polygon for each stand by repeating these steps. Type a ‘2’, ‘3’ etc after your name when you’re saving each .kmz file.
Editing a .kmz polygon in Google Earth
In the left-hand margin of the Google Earth window, look for the name of the polygon you want to edit. Right click on this and select "Properties" (Windows) or "Get info" (Mac). This opens the dialogue box.
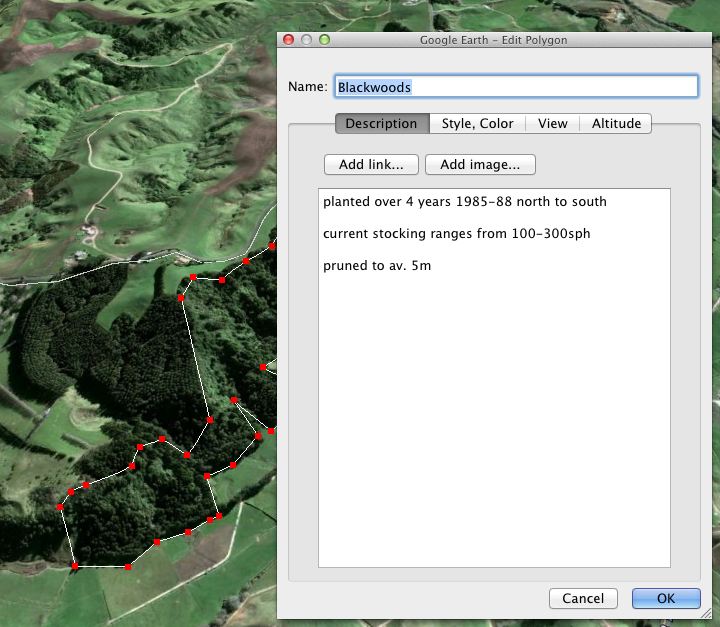
You can now edit your polygon or the dialogue box. Note the red dots.
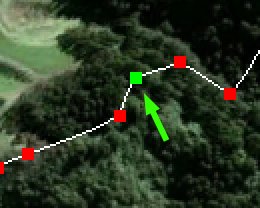
When you hover your mouse over a red dot it turns green. You can now click and drag this dot to where you want. When you're finished click "OK".